In today’s lesson, I learned about how to hide and show edges and a good tip to know what object is selected.
When working with a group of objects and the selected box is distracting, one quick fix is to use the Direct Selection Tool. However, this also can be a nuisance. To fix that, head to View, then click Hide Edges, hiding the selected border of the object.
When hidden, it is hard to tell what object is selected, so one good way to know is by looking in the Control Panel, which lists the object’s details.
If you want the edges to show, head to View then Show Edges.
In this lesson, I learned about the Align Panel and its many features that help position content accurately.
Align Panel with Vertical Align Center
The most basic commands when it comes content positioning is the align command or working with the Align Panel. It gives you the ability to make sure your content is evenly spaced.
To open the Align Panel, go to the Window menu and choose Align. This will pop up the Align panel with 3 self-explanatory tabs. This has many features like Vertical and Horizontal Align Center, but keep in mind that it’s easiest to work with aligning if all of the objects are selected. One useful tool is the Distribute Object Section, which takes the first and last object to evenly space out the objects in between.
Today, I learned about smart guides and how to customize them.
Smart guide appearing
Smart Guides are temporary snap‑to guides that appear when you create or manipulate objects or artboards. These appear when the object is position to a certain point of another object, like the right side or the center.
You can customize these smart guides by going to Preferences, then Smart Guides. This allows you to change the color, change options of what it reveals, change construction guides, and change the snapping tolerance or sensitivity. To turn them off, head to View, then choose Smart Guides.
In this lesson, I learned a little more about guides, but most importantly, how to set up and customize a grip and how to work with the snap features.
Artwork with grid pattern
By default, when you grab an object by clicking and dragging, you can have it snap to the guide as long as the cursor is intersecting with the guide. This option is called Snap to Point which can be found under the View menu. When deselected, the object to snap to guide independently.
Not only do rulers and guides help position your content, but grids as well. Head to View and click Show Grid, making a grid pattern over the document. You can customize it by going to Preferences in the control panel, then Guides & Grid, opening a dialog box. In here, you can change the color and style of the guides and grid, not to mention the grid size and subdivision.
Under the View menu, there is an option called Snap to Grid. What this will do is snap to the intersecting gridlines. You can also make it invisible by going to View, then Hide Grid.
For this lesson, what I got away was the vast usage of rulers and guides to get precise results for your artwork.
An artboard with rulers and three guides
Rulers and guides help align text and graphic objects. To begin, head to the View and choose Rulers, then Show Rulers, making a top and side ruler appear.
When finding exact measurements on an artboard, it’s easiest to have the 0,0 point aligning with the artboard. If the 0,0 point isn’t set up with the artboard, place the cursor in between the horizontal and vertical guides, then click and drag and move it to an ideal spot. However, when working with multiple artboards, it becomes very difficult to find a measurement. To fix that, head to View and Rulers once again and select Change to Artboard Rulers, which sets the 0,0 point to the active artboard.
Another good thing about rulers is that if you want to zoom in, the tick marks are updated based upon magnification. You can also change the measurement by right clicking on the ruler and selecting a unit of measurement.
When working with rulers, you’re simultaneously working with guides, too. To create a guide, place the cursor in the ruler, then click and drag out a guide. Click again to set down the guide and lock it in place in the View menu, then Guides, then Lock Guides.
There are many uses with guides like moving them wherever and turning off visibility. To do that, head to View, then Guides, then Hide Guides. You can also toggle the guide either horizontally and vertically by clicking and dragging on the ruler and holding down the Alt key.
A nice feature of Illustrator gives you the ability to make a guide out of a path. Create a rectangular shape with the Rectangle Tool, then View, Guides and Make Guides, and that shape is now a guide. You can undo that by simply going into View, then Guides, then Release Guides. Make sure it isn’t locked or else this feature can’t work. Finally, to get rid of the guides, head back to View, then Guides, then Clear Guides.
In today’s lesson, I learned how the control panel recognizes and modifies different objects and how it can be customized.
Artwork with Control Panel detailing selected object
The Control panel, or the options bar, offers quick access to options related to the objects you select. It’s very crucial since it changes based upon what you have selected and what you’re working inside of the document.
When selected, the control will show what type that object is, color, stroke and stroke weight, width profile, brush definition, and much more. For customization, head to the far right-hand side of the screen, there’s a button with all of the options that can appear in the panel. You can also move the panel to the bottom by clicking Dock To Bottom.
In this lesson, I learned about the 2 panels and how they work. I also learned how Mac users can achieve the same compared to Windows.
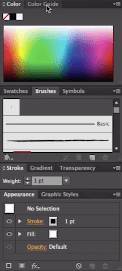
Color property panel
For Mac users, the document will appear as an Application Frame, and if not preferred, head to the Window menu and deselect Application Frame. This will make a document a free-floating window which is how most Mac applications behave. Anytime you need to go to the Preferences dialog box, head to the Illustrator menu at the top of the screen, then Preferences.
To the left side is the tools panel where you can access different tools and mechanisms for your artwork. You can change the Tools panel from 2 columns to 1 by heading to the top left of the panel where you can see 2 little arrows, which can be clicked, causing the panel to collapse.
On the right side are the properties panels and the same thing can be done by clicking the arrows to expand the panel view. If you want the panel to be free-floating, just click and drag the panel tab onto the document, and can be placed back by clicking and dragging.
If you want to add more panels, simply go the the Windows menu and select any panel underneath. If you click on a panel that has already been selected, it will expand on its own.
Today, I learned how to properly save documents by adding metadata and keywords so that I can easily find a certain document.
Saving document in Illustrator is the same process in any application, but saving metadata in a document to make it searchable by programs like Adobe Bridge is completely different.
Document Save Dialog Box under Description Tab
Firstly, Head to File menu then File info, opening a dialog box. There’s several different tabs within the box, for example, Description, which contains useful options for adding metadata. Not only can contain the document title and information about the author, but more importantly, you can provide keywords for the document. This comes in hand when saved work from years ago becomes easily searched and found.
During this lesson, I learned about different templates Illustrator offers and the usefulness of them
New from Template Dialog Box
To start, head to File menu then New from Template, which opens the New from Template dialog box within the Templates directory. When you open one of these templates, for example tech, there’s many different template files. To open one, click and select New to create a new document.
One template that is extremely useful is the Blank Templates. To get them, head back to File -> New from Template -> Blank Templates. Select one, for example, Banners, and open it up in a new document. You can see that they’re premade artboards predefined to industry banner dimensions.
In today’s lesson, I worked on many properties and functions of an artboard and how a multitude of them can come in handy.
Artboard Dialog Box
Illustrator allows you to have multiple artboards on a document, which comes in handy. For example, a design can be easily implemented on a letterhead, an envelope, and a business card without having to move tabs and switch between documents.
To begin, click File then New to open the dialog box. Head down to Number of Artboards and type in 4. To the right, there’s different arrangements (Grid by Row, Grid by Column, Arrange by Row, Arrange by Column). Underneath, you can change the spacing between the artboards. Once everything is set up, click OK. You should a new document with 4 artboards displayed.
On the right hand side, there is an artboard layer panel where you can work on an individual artboard. If it isn’t there, head to the Window menu at the top of the screen and select Artboards. By double-clicking on an Artboard in the panel, you can change the name. If you wanna delete or create an artboard, there’s 2 buttons at the bottom of the panel that have that function. You can also change the stacking order of the artboards.
A useful tool that works specifically with artboards is the Artboard Tool. Once selected, you can click on each of the artboards, making them active, and creates a bounding box where you change the size and move it. You can also delete it by clicking the X in the top right corner of the artboard and creating one by simply clicking and dragging. Furthermore, by holding down Alt key on Windows, Option on Mac, and clicking and dragging on an artboard, you can duplicate it.
There are additional properties of an artboard in the Artboard Options button which is located in the Tool Bar. Once clicked, it opens the Artboards Dialog Box where you can name it, set width and height, X Y coordinate relevant to the canvas, set reference point, orientation, and many others. There’s also additional display options like Show Center Mark and Show Cross Hairs.